

Before editing the proof text, please ensure that you are familiar with Reviewing a Proof – The Basics
Step 1.
Click on the View Proof button within the GoProof review email.
Step 2.
The proof will automatically open in a web browser.
Step 3.
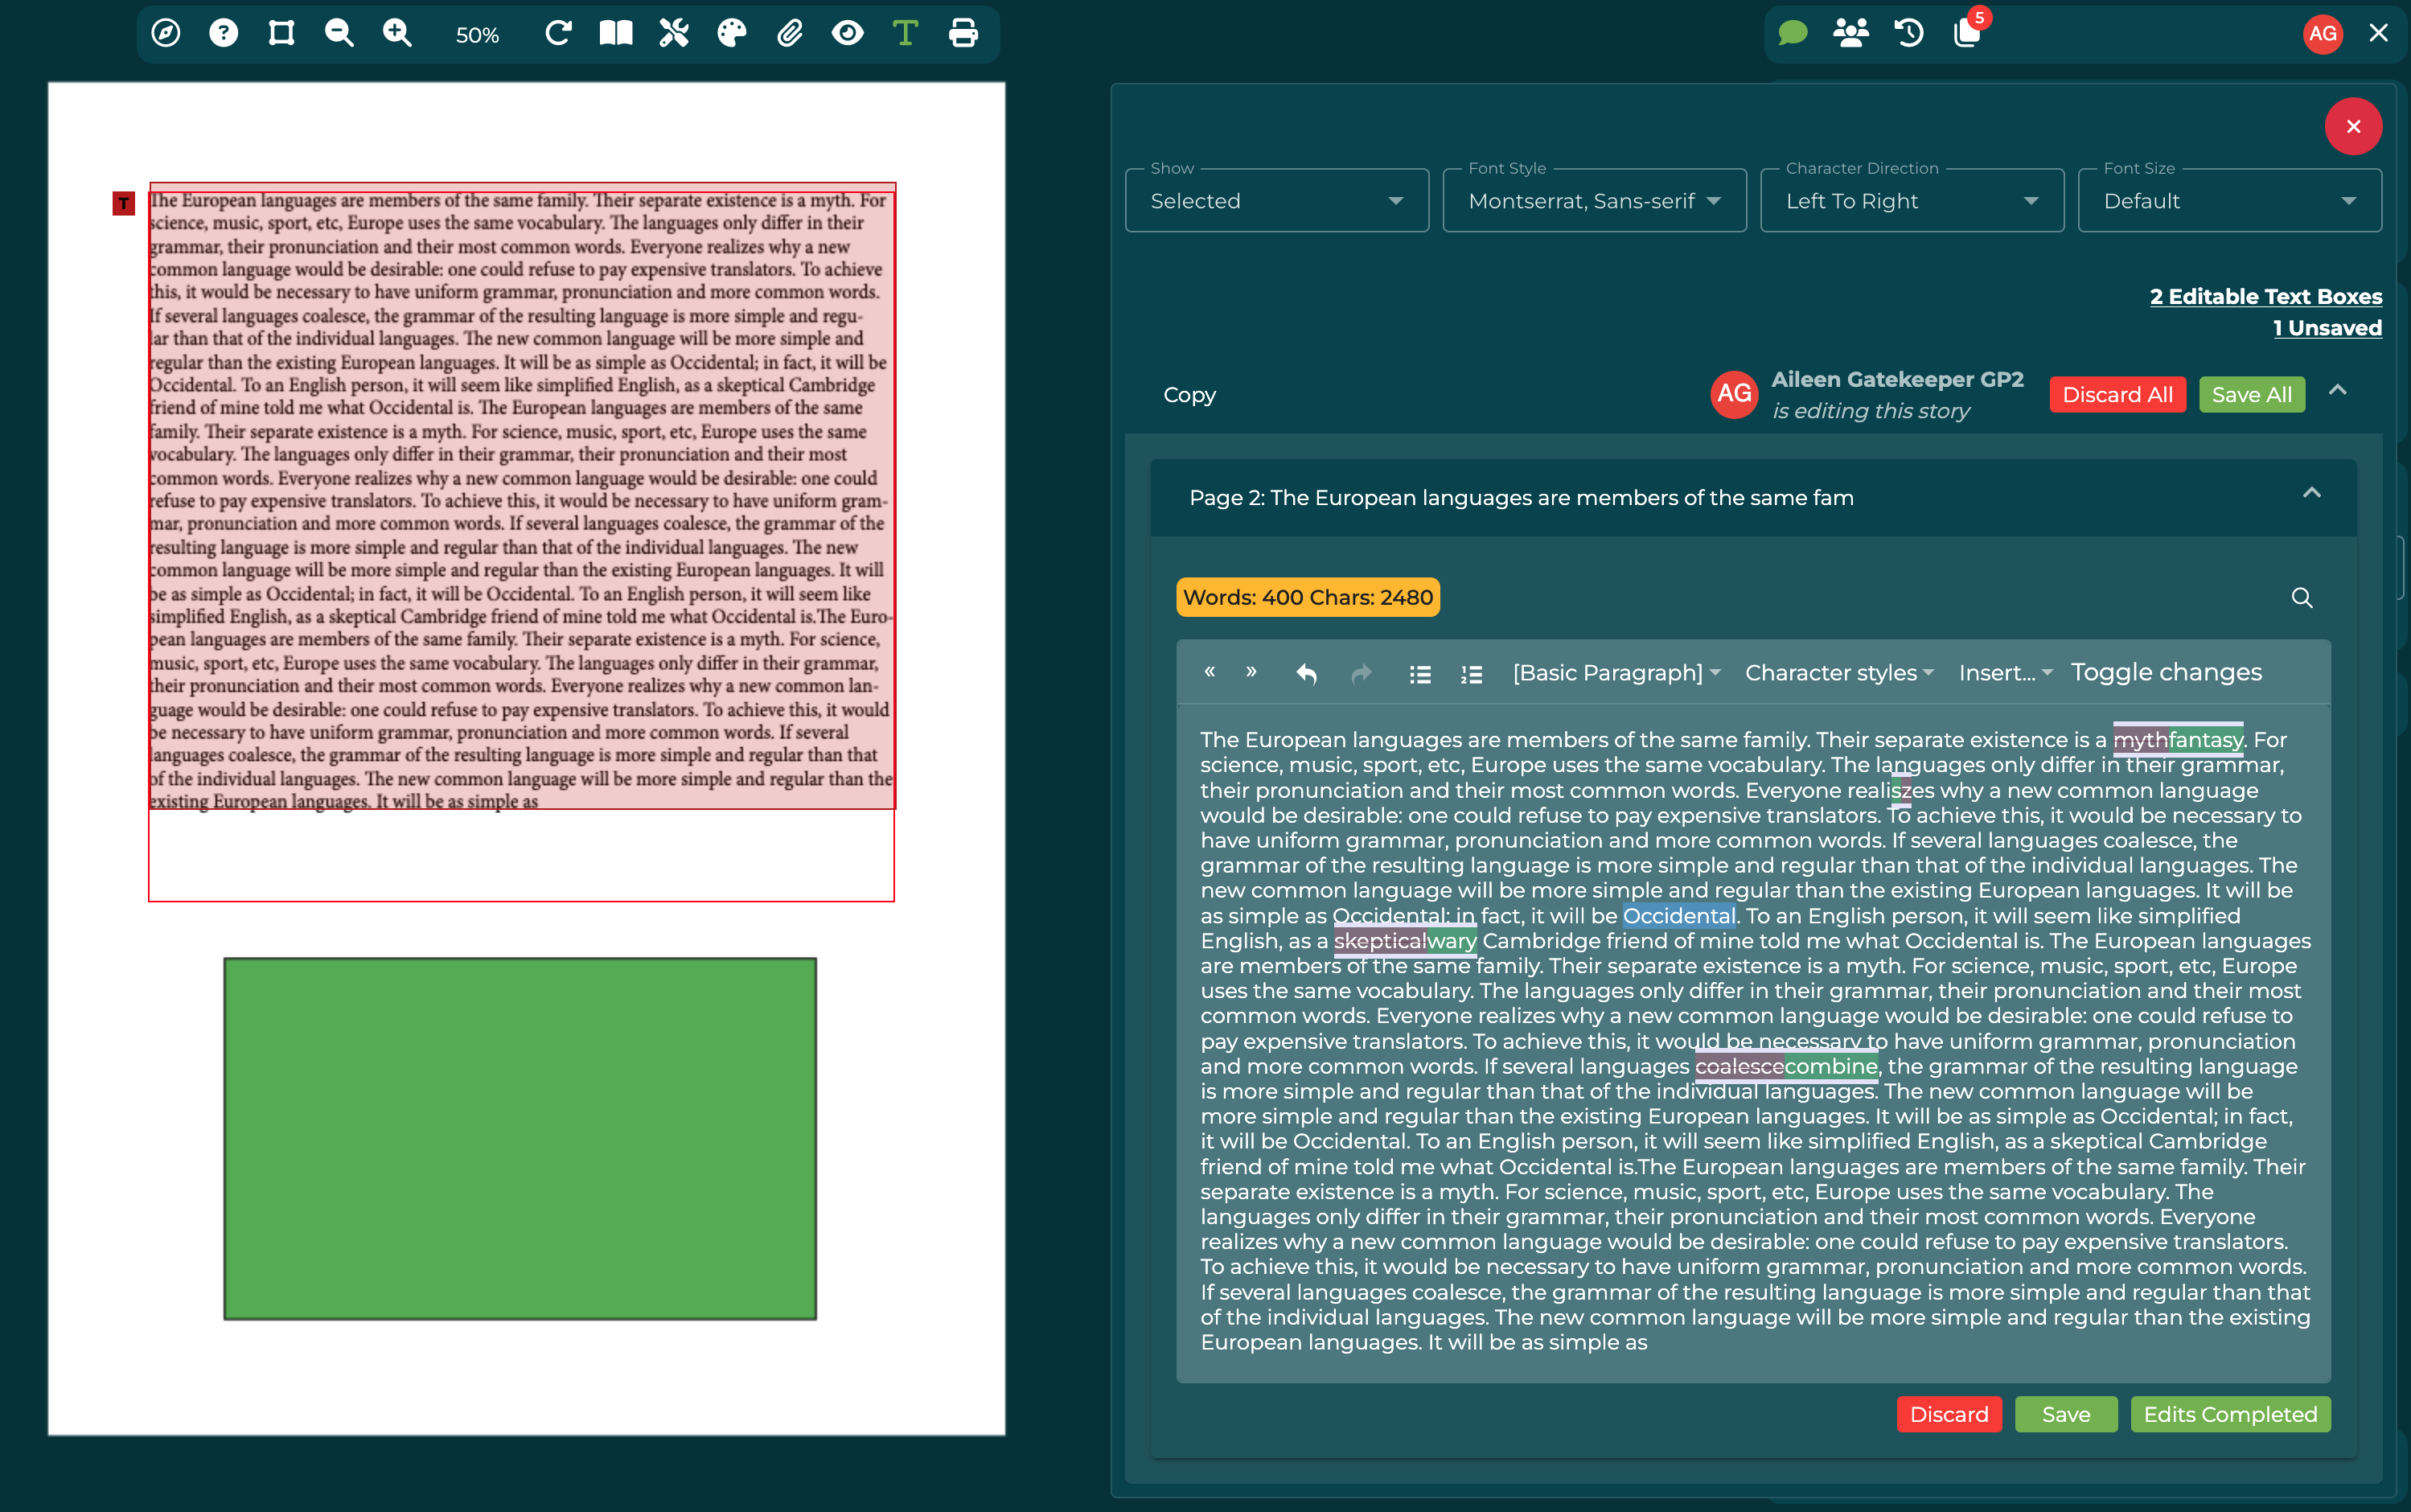
In the toolbar, click T icon

Note: If you do not see the T icon, then you are not currently set to be able to edit the text, the format of the proof doesn't support text edit or text edit was disabled by the proof sender. If text edit is enabled, however, you cannot see the T icon you should contact your proof sender or Gatekeeper and ask them to turn this feature on for you.
Step 4.
A popup will open for editing the text in.
Step 5.
Select an area of text to edit. Editable text boxes show a T (red), E (amber) or C (green)icon on the preview.
Step 6.
Make any required edits to the text in the pop up.
Step 7.
Once you have done your edits, either click Save if you want to save your edits but wants to indicate that you will be making more edits to it later in the current proofing round or click Edits Completed to save your edits and indicate you are finished in making your edits.

Pro tip:


